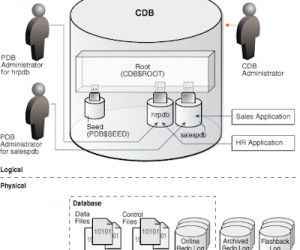
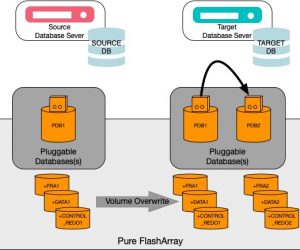
Với Oracle Database 19c, việc cài đặt trở nên nhanh chóng và dễ dàng hơn khi sử dụng RPM, tuy nhiên nếu ai đã quen với sử dụng giao diện đồ họa cài đặt của Oracle từ 11g tới 18c thì việc cài đặt RPM sẽ cảm thấy khó khăn hơn 1 chút. Vì vậy trong bài viết này, sẽ hướng dẫn cài đặt Oracle Database 19c trên Linux sử dụng RPM một cách chi tiết nhất.
Trường hợp bạn muốn cài đặt trên Windows vui lòng tham khảo bài viết dưới đây
1. Yêu cầu hệ thống
- Server Display Cards: Ít nhất 1024 x 768 display resolution
- Có kết nối mạng
- Tối thiểu 1 GB RAM, khuyến nghị nên cài 2GB RAM cho Oracle Database.
- Tối thiểu 8GB RAM cho Oracle Grid Infrastructure.
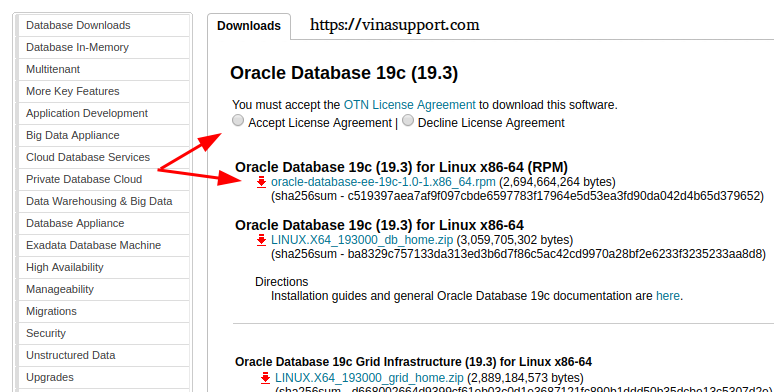
2. Download Oracle Database 19c
Bác bạn download bằng đường link bên dưới:
3. Cài đặt Oracle Database 19c
Trên CentOS 7 / RHEL 7
Đầu tiên trước khi cài đặt Oracle, chúng ta cần chạy cài Oracle Preinstall RPM. Việc cài đặt các bạn cần sử dụng user root.
curl -o oracle-database-preinstall-19c-1.0-1.el7.x86_64.rpm https://yum.oracle.com/repo/OracleLinux/OL7/latest/x86_64/getPackage/oracle-database-preinstall-19c-1.0-1.el7.x86_64.rpm
yum -y localinstall oracle-database-preinstall-19c-1.0-1.el7.x86_64.rpm
rm oracle-database-preinstall-19c-1.0-1.el7.x86_64.rpm
Thư mục ORACLE_HOME sẽ được cài đặt có đường dẫn là: /opt/oracle/product/19c/dbhome_1
Cài đặt Oracle bằng command:
yum -y localinstall oracle-database-ee-19c-1.0-1.x86_64.rpm
Trường hợp gặp lỗi : Requires: compat-libstdc++-33 khi cài đặt thì sửa bằng command sau:
wget --no-check-certificate http://mirror.centos.org/centos/7/os/x86_64/Packages/compat-libstdc++-33-3.2.3-72.el7.x86_64.rpm
rpm -ivh compat-libstdc++-33-3.2.3-72.el7.x86_64.rpm
Sau đó chạy lại file cài đặt.
Trên CentOS 8 / RHEL 8
Chạy command sau để cài đặt các thư viện cần thiết
dnf install -y bc binutils elfutils-libelf elfutils-libelf-devel fontconfig-devel \
    gcc gcc-c++ glibc glibc-devel ksh ksh libaio libaio-devel libgcc libnsl libnsl.i686 \
    libnsl2 libnsl2.i686 librdmacm-devel libstdc++ libstdc++-devel libX11 libXau libxcb \
    libXi libXrender libXrender-devel libXtst make net-tools nfs-utils smartmontools \
    sysstat targetcli unixODBC;
Sau đó cài đặt compat-libcap1
wget --no-check-certificate https://rpmfind.net/linux/centos/7.9.2009/os/x86_64/Packages/compat-libcap1-1.10-7.el7.x86_64.rpm
rpm -ivh compat-libcap1-1.10-7.el7.x86_64.rpm
Rồi thực hiện các bước như trên CentOS 7 / RHEL 7
4. Tạo Oracle Database
Thực hiện set hostname, sửa file /etc/hosts
127.0.0.1 localhost localhost.localdomain localhost4 localhost4.localdomain4
::1 localhost localhost.localdomain localhost6 localhost6.localdomain6 vinasupport.com
172.20.108.133 vinasupport.com
RPM sẽ tạo 1 database demo:
- Database: ORCLCDB
- SID: ORCLCDB
- Pluggable Database (PDB): ORCLPDB1
Tạo database bằng command sau:
[[email protected] ~]:~$ /etc/init.d/oracledb_ORCLCDB-19c configure
Configuring Oracle Database ORCLCDB.
Prepare for db operation
8% complete
Copying database files
31% complete
Creating and starting Oracle instance
32% complete
36% complete
40% complete
43% complete
46% complete
Completing Database Creation
51% complete
54% complete
Creating Pluggable Databases
58% complete
77% complete
Executing Post Configuration Actions
100% complete
Database creation complete. For details check the logfiles at:
/opt/oracle/cfgtoollogs/dbca/ORCLCDB.
Database Information:
Global Database Name:ORCLCDB
System Identifier(SID):ORCLCDB
Look at the log file "/opt/oracle/cfgtoollogs/dbca/ORCLCDB/ORCLCDB.log" for further details.
Database configuration completed successfully. The passwords were auto generated,
you must change them by connecting to the database using 'sqlplus / as sysdba' as the oracle user.
5. Thay đổi mật khẩu của User sys
Vì quá trình cài đặt hoàn toàn tự động, nên mật khẩu sinh ra cũng tự động. vì vậy để sử dụng Oracle chúng ta cần đổi mật khẩu của các user cần thiết.
Đổi mật khẩu của Oracle User:
passwd oracle
Set biến môi trường cho user oracle, sửa file /home/oracle/.bash_profile, thêm nội dung sau:
export ORACLE_BASE=/opt/oracle
export ORACLE_HOME=$ORACLE_BASE/product/19c/dbhome_1
export ORACLE_SID=ORCLCDB
PATH=/usr/sbin:$PATH:$ORACLE_HOME/bin
export PATH
Chạy lệnh: source /home/oracle/.bash_profile để cập nhật lại biến môi trường
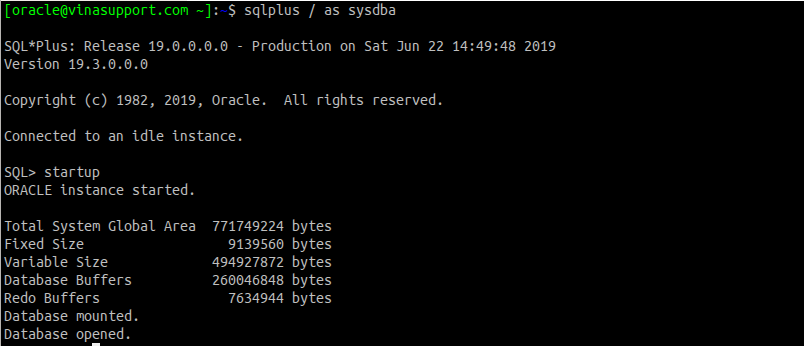
Khởi động Oracle Database
[[email protected] ~]:~$ su - oracle
[[email protected] ~]:~$ sqlplus / as sysdba
SQL> startup
Đổi mật khẩu của user sys:
[[email protected] ~]:~$ su - oracle
[[email protected] ~]:~$ sqlplus / as sysdba
SQL> alter user sys identified by 123456;
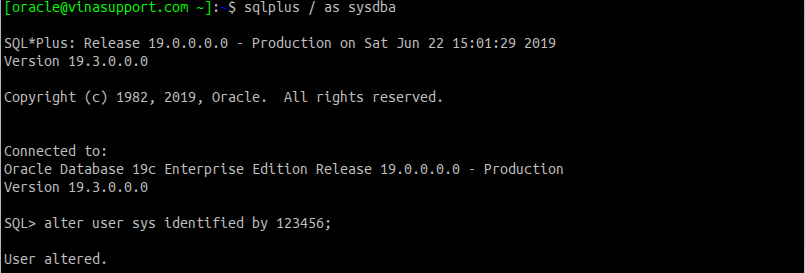
Nguồn: vinasupport.com

